Bleed and Crop Marks in Illustrator
Bleed is an essential guideline for ensuring a professional finish on printed materials. It refers to the area where the design extends about 3mm beyond the final trim size, preventing white borders from appearing on the edges of the paper due to any slight misalignment during cutting.
In this article, we will discuss the importance of bleed, examples of when it's unnecessary, and how to create it. For those about to design printed materials, this guide will be useful.
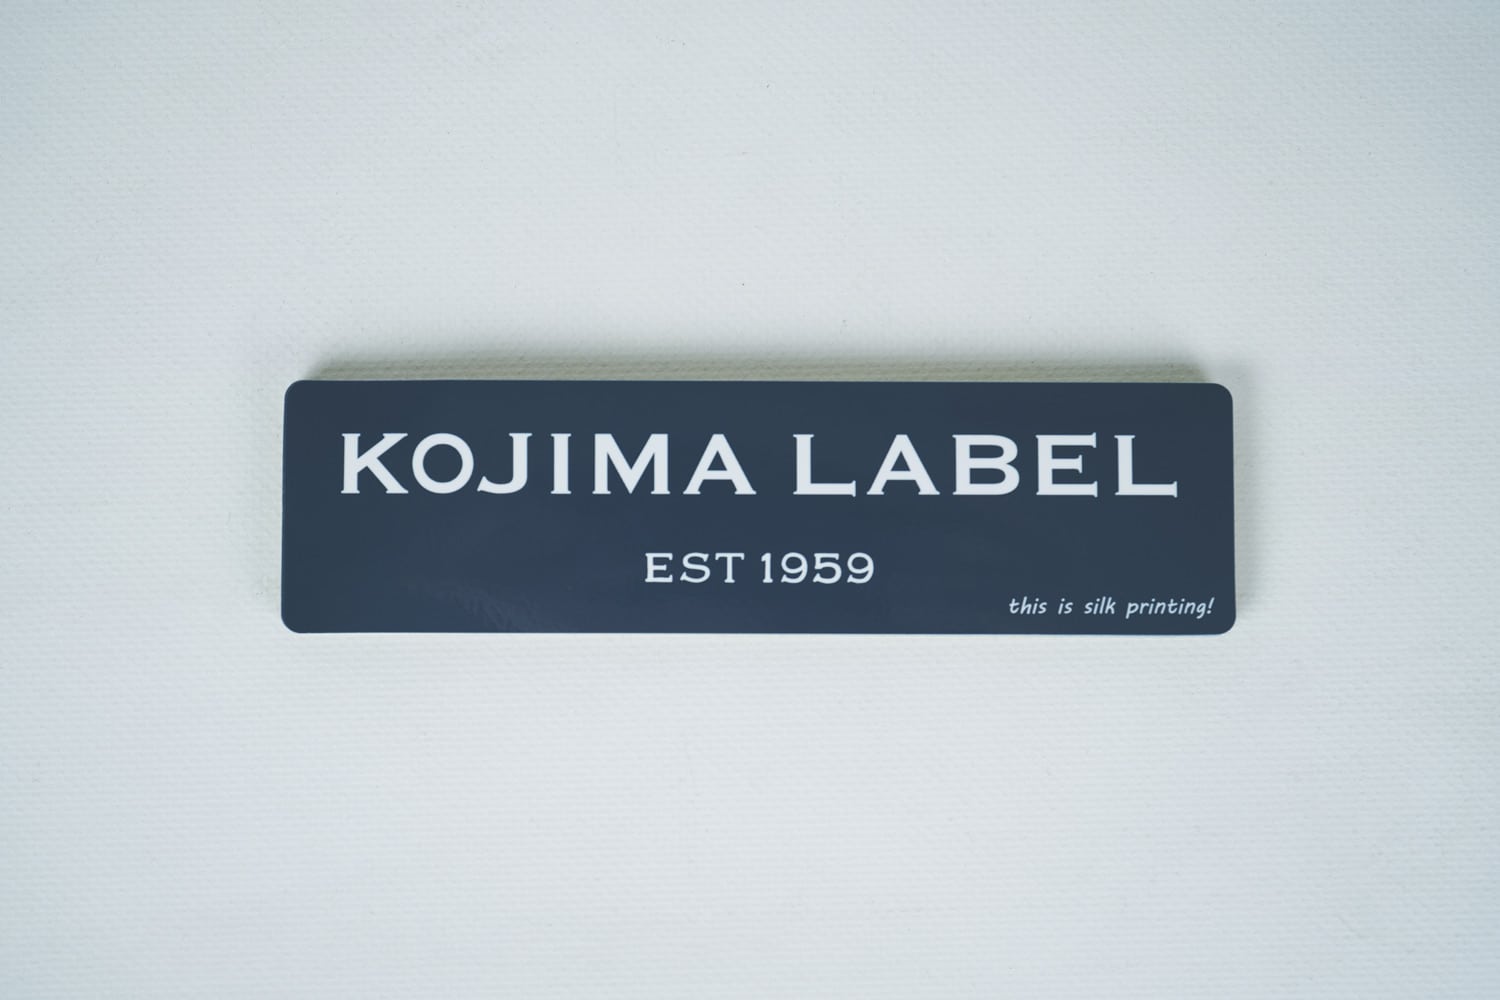
As a printing company specializing in labels and stickers, we create a wide range of labels, seals, and stickers tailored to various uses.
If you need assistance with product label design, feel free to contact us using the link below.
For those struggling with label and sticker printing
Wondering if this kind of printing is possible? Or how much budget is needed?
If you have any concerns, feel free to reach out to us.
First, check out our case studies.
※Orders are available starting from 1,000 pieces.
※Business hours: Japan Standard Time, Monday to Friday, 9:00 AM - 5:00 PM
TOC
What is Bleed in Printing?

Bleed is an essential step when creating borderless prints.
By extending the design about 3mm beyond the final trim size, bleed ensures that the design does not get cut off during the trimming process.
For example, when designing brochures or business cards that require printing all the way to the edge of the paper, the design data must be created larger than the final size. Adding this extra portion is the process of creating bleed.
Although not always required, submitting data without bleed may necessitate corrections before the printing process can proceed. Therefore, it is important to understand bleed when creating print designs.
At our company, we can accommodate simple designs without bleed. If you're unsure about how to set bleed, feel free to contact us through the "Contact Us" section for support.
The Importance of Bleed in Printing
Bleed is a crucial step in ensuring the finished print looks clean and professional. Unlike home printers that print directly onto A4-sized paper, commercial printing machines print multiple data sets onto large sheets of paper, which are then stacked and cut afterward. This cutting process is known as "trimming."
During trimming, the paper is cut with a large, heavy blade, which can result in slight misalignments (cutting shifts). This is especially common when cutting large stacks of paper and can lead to issues such as the following, so caution is necessary.
- Lines or designs may not print all the way to the edge of the paper.
- White gaps may appear next to the background.
- The overall print quality may be compromised.
Bleed is designed to account for cutting shifts and ensure that the design's edges are preserved. By extending the design about 3mm beyond the final trim size (cut path), any slight misalignment during trimming will not cause the design to be cut off.
For more information about the cut path, please refer to the article below.
What Is a Cut Path? A Guide to Creation and Key Considerations
Printed Materials That Require Bleed
Bleed is necessary for "borderless" prints. Borderless printing refers to materials where the design or printed content extends all the way to the edge of the paper, without any margin.
For example, printed materials like movie posters, flyers, and brochures, where the design goes all the way to the edge of the paper, require bleed to ensure the design is maintained properly.
Printed materials that do not require bleed.

On the other hand, printed materials with borders or designs with a white background do not require bleed.
Bordered printing refers to prints that have a certain margin around the edges of the paper. In this type of print, bleed is unnecessary because the margin provides a buffer.
Additionally, when the background is white or the design is placed only in the center of the paper, bleed is also not required. The presence of a margin makes it less likely for trimming misalignment to affect the final product, ensuring that there are no issues with the finished print.
How to Create Bleed
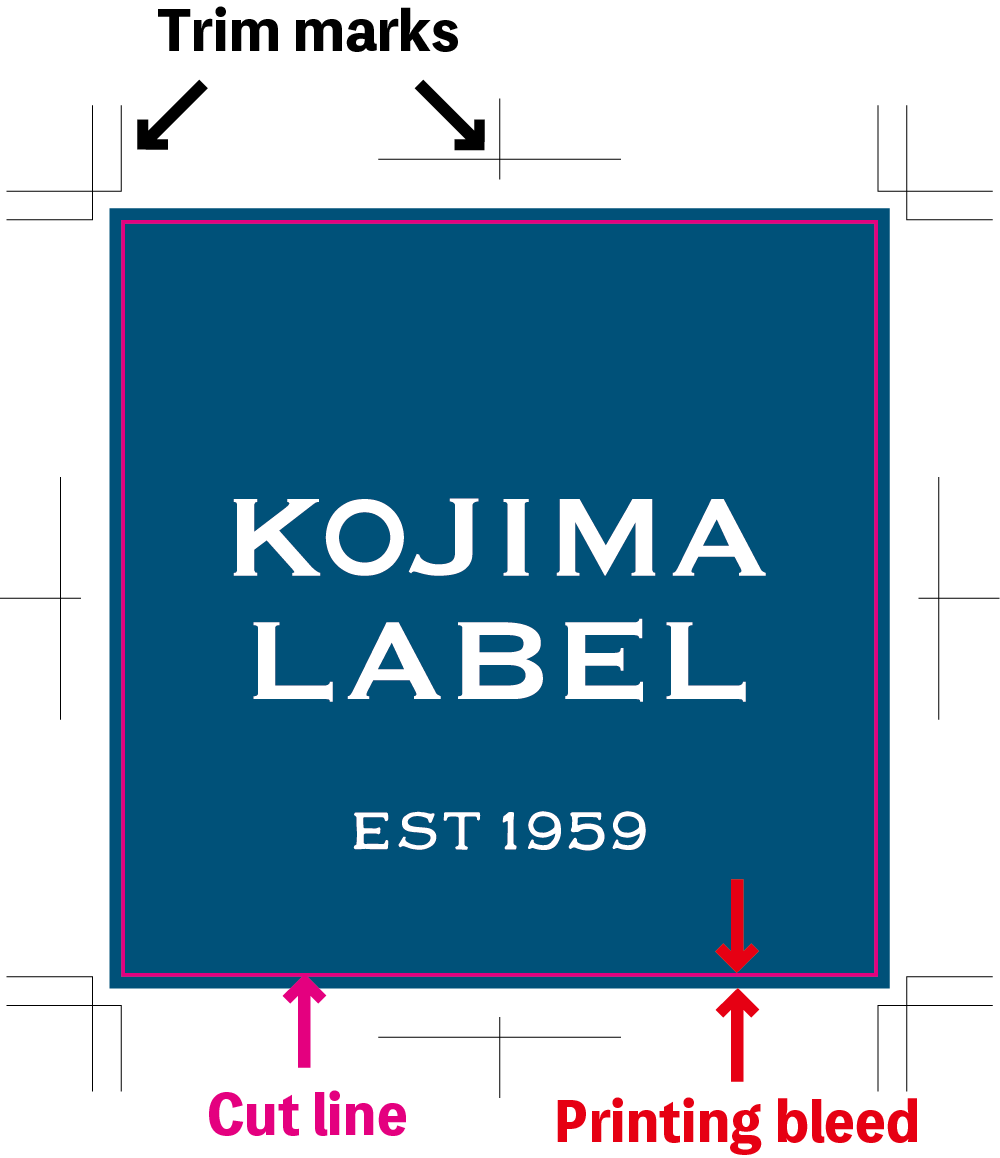
When creating bleed, it is important to clearly indicate the final trim position and set the correct size. To set up bleed, you create "crop marks" that show the final trim area.
Crop marks are symbols that typically resemble overlapping L-shapes, acting as guides during the cutting process.
There are two main types of crop marks:
- The inner line is the "inner trim mark" , which indicates the final trim position.
- The outer line is the "outer trim mark" , which indicates the bleed area.
Create crop marks and extend the design about 3mm beyond the final trim size.
Specifically, if the bleed width is 3mm, you need to extend the design by 3mm on each side (left, right, top, and bottom), for a total of 6mm. Below is an example of the size after adding the bleed.
| Paper size | Bleed added size |
| A4 size(210mm×297mm) | 216mm×303mm |
| A5 size(148mm×210mm) | 154mm×216mm |
| B4 size(257mm×364mm) | 263mm×370mm |
| B5 size(182mm×257mm) | 188mm×263mm |
Steps to Create Bleed in Different Tools: [Illustrator & Photoshop]
Here are the steps to create bleed using Illustrator and Photoshop. We will explain the specific procedures for each tool, so please use this as a reference.
How to create it in Illustrator
There are two ways to create this in Illustrator.
- Create registration marks as objects
- Create registration marks when creating a PDF
Create registration marks as objects
Illustratorはバージョンによってトンボの作り方が異なります。
以下に詳細の手順をまとめました。
- Set Up a New Document with Bleed:
Open Illustrator and create a new document.
In the New Document dialog box, enter the desired dimensions for your document.
Under the Bleed section, set the bleed to 3mm (or your preferred size). This will extend the design beyond the trim line. - Design with Bleed:
Create your design as usual, making sure any elements that should extend to the edge of the paper (such as background colors or images) extend into the bleed area. - Add Crop Marks (Trim Marks):
When you are ready to export, go to File > Export > Export As and choose your file format (e.g., PDF).
In the export settings, make sure to select Use Document Bleed Settings and check the Crop Marks option. This will add the trim marks and indicate where the document will be cut. - Export the Document:
Save your document with bleed and crop marks, and it’s ready for print!
Create registration marks when creating a PDF
The steps to create crop marks when creating a PDF are as follows:
- Prepare Your Document:
Make sure your design is complete and includes the bleed area (extended by about 3mm outside the final trim size). - Open the Export Dialog:
Go to File > Save As or File > Export > Export As.
Choose Adobe PDF (Print) as the file format and click Save. - Enable Crop Marks and Bleed:
In the Save Adobe PDF dialog box, choose the [Press Quality] preset for high-quality print output.
Go to the Marks and Bleeds section on the left sidebar.
Check the box for Trim Marks under Marks to add the crop marks.
Under Bleed and Slug, ensure that Use Document Bleed Settings is selected to include the bleed area in your export. - Adjust PDF Settings (Optional):
If needed, adjust other settings such as compression or color options to suit your printing requirements. - Save the PDF:
Once everything is set, click Save PDF. Your PDF file will include both the crop marks and the bleed area for printing.
We provide Illustrator templates for design submissions. You can download them for free from the link below. If you have any questions, feel free to contact us.
Illustrator Submission Template
How to create it in Photoshop
Photoshopでは印刷用のデータを作成する際、Illustratorのように自動でトンボを作成する機能がありません。
代わりに、塗り足し用に背景を上下左右3mmずつ大きく作ったサイズのデータを入稿します。トンボの代わりに仕上がり位置にガイドを作成します。
Photoshopで仕上がり位置に応じてガイドを作る手順は以下のとおりです。
- Set Up a New Document with Bleed:
Open Photoshop and create a new document.
In the New Document dialog, set the Document Size to your final trim size.
To add bleed, increase the canvas size by 6mm (3mm on each side) under the Width and Height fields. This will give you a 3mm bleed on all sides. - Create Your Design:
Start designing your artwork as usual. Ensure that any elements that should extend to the edge of the paper (such as backgrounds or images) extend into the bleed area.
Make sure all important content remains within the trim size (the original document size without the bleed). - Adding Crop Marks (Trim Marks):
Photoshop doesn't have built-in crop mark tools like Illustrator, so you will need to manually add crop marks:- Use the Line Tool to create small lines at the corners of your design, indicating where the trim should occur.
- Ensure that the lines are placed at the edges of the bleed area, and adjust them to resemble crop marks.
- Export the Document:
Once your design is ready with the bleed and crop marks, go to File > Save As and choose PDF as the format.
In the Save Adobe PDF dialog, make sure to set the bleed area correctly and adjust the settings for high-quality print output.
Make sure to also select Use Document Bleed Settings if exporting directly to PDF for print.
Bleed in Labels and Stickers
Bleed is also an important element for ensuring a beautiful finish in label and sticker printing.
Below, we have summarized the guidelines for bleed and margins based on the delivery format.
| Label/Sticker Format | Bleed size |
| Sheet cut finish (multiple pieces on one sheet) | 2mm |
| 1 piece cut | 2mm |
| roll | 2mm |
| Cutting and finishing | 3mm |
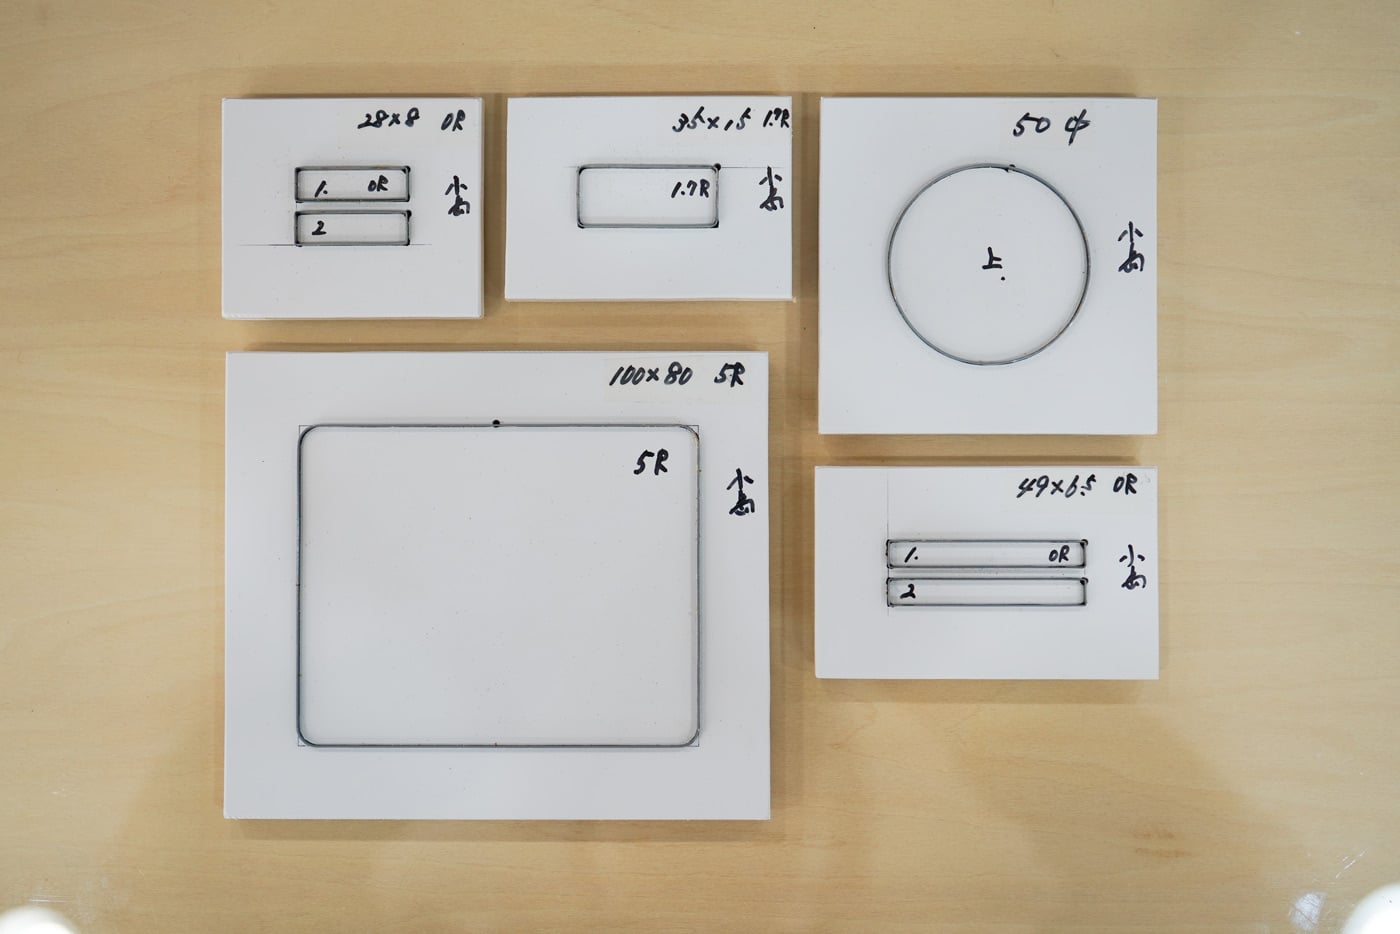
Sticker Finishing Options for a Perfect Finish
However, the specifications for bleed and margins may vary depending on the printing company, so be sure to check the guidelines of the printing company you will be using before creating your data.
At our company, we ask that you include at least 2mm of bleed and avoid printing within 1.5mm of the cut line.
Our data submission guidelines are available in the article below, so please take a look.
Data Submission Guide
塗り足しを作成する際の注意点

Finally, here are some important points to keep in mind when creating bleed.
The main points to remember are as follows:
- Do not enlarge the entire design to create bleed.
- Consider cutting shifts when setting up the bleed.
- Set the crop marks (trim marks) on the front layer.
Note 1: Do not enlarge the entire data and fill it in
When creating bleed, do not enlarge the entire design. Instead, only extend the background or patterns. Enlarging the entire design can lead to the following potential issues, so caution is required:
| problem | Contents |
| Text and images go outside the trim line | Important design elements move closer to the cut path (cut line), increasing the risk of them being cut off during cutting |
| The finish is uneven | Enlarging the design can cause it to lose its balance, which can make the finished product look unnatural. |
Consider the area 3mm inside the trim line as the "safe zone" for text and design elements. By keeping important elements within this safe zone, you can avoid the risk of cutting off text or logos, even if slight cutting shifts occur.
When creating bleed, make sure to extend the background or patterns to the bleed area, but avoid extending text or logos, as they are critical information. Do not enlarge the entire design; only extend the background or decorative elements into the bleed area.
Note 2: Consider cutting deviations
In the production of printed materials, it is impossible to completely prevent cutting shifts. Therefore, it is also important to design in a way that minimizes the visibility of any shifts.
Designs with evenly spaced elements are particularly prone to looking uneven due to cutting shifts.
For example, when creating a design that surrounds the edges, making the border width thicker helps to make any shifts less noticeable. If the border is too thin, it may appear unnatural or even disappear if misaligned.
Therefore, when designing with evenly spaced elements, it is recommended to set the border width to at least 3mm or more.
Note 3: Set the crop marks (trim marks) to the front
Crop marks are essential guides for trimming and alignment in printed materials. To avoid being hidden by elements such as bleed, they should be placed on the front layer.
If the crop marks are hidden, the printing company may ask for data corrections or resubmission. Before submitting your design to the printing company, make sure to check that the crop marks are set on the front layer.
Avoid cutting misalignment by adding bleed
Bleed is an essential step in the printing process to prevent design interruptions caused by slight shifts in the cutting machine. It is a requirement at many printing companies, and by setting up bleed correctly, you can ensure a beautiful final product.
However, the size of the bleed and other specifications may vary depending on the printing company, so it's important to check their guidelines beforehand.
As a specialized printing company for stickers and labels, we offer custom-made production. We provide careful support in design, material selection, and other areas to ensure your finished product matches your vision. Feel free to consult us for any assistance.

Start Your Project Now!
Contact Us or Get a Quote!